Friday, December 31, 2010

Snowy Farm


Winter.
Long cold nights with crisp stars shining.
Hauling firewood, feeding the furnace.
Frozen water in the chicken coop.
Sledding tracks down the hill.
Holiday frenzy, over now.
Homemade soup.
Knitting.
Seed catalogs arriving.
Days slowly getting longer.
Deer and fox tracks in the snow.
Almost time to prune the apple trees.
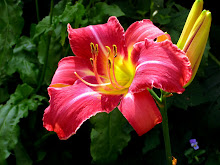
Daylily blooms, still six months away.
Waiting.

Thursday, November 11, 2010

Too Dirty for Me!


I have to confess to being one of those people who have held some romantic notions of the past, despite – or maybe because of – having portrayed early 17th century life in New Plimoth for some years. It’s so easy to think that life was more simple, straightforward, less harried and unburdened with the complexity of modern life; it can sound quite appealing. It is, perhaps, a great part of the motivation of many of us who have moved out to the country, trying to recreate to some degree a more direct and sustainable way of life.

But, of course, the reality of the past isn’t exactly what we might imagine it was. Not even close. I’ve learned this in various ways, and I’m still learning it. Right now I’m reading Where We Lived: Discovering the Places We Once Called Home by Jack Larkin, chief historian at Old Sturbridge Village. It first appealed to me as a remarkable collection of photographs of the domestic architecture of early America, most of them taken by the Library of Congress Historic American Building Survey. But what has been even more illuminating are the many passages taken from primary sources, written by American and European travelers about the various places they visited in our country’s early years, describing what they saw and experienced.

For most Americans, from the earliest European settlements up until the twentieth century, domestic life was very different from what we know today. It was common, say, to find 8-12 people living in a 3- or 4-room house, several to a bed; privacy did not exist. Today’s average household numbers 2.6, with an average of 1200 square feet per person; back in 1800, the census records show that houses in Brookfield, Massachusetts averaged about 120 square feet per person; one-tenth of the space we enjoy today. A household usually consisted of husband, wife, and children – as today – but often also included elderly parents, unmarried brothers and sisters, widowed daughters, orphaned grandchildren, even married children and their kids – not to mention any hired household or farm help. And that was the average; there was an astonishing amount of poverty as well, tumbledown shacks and hovels unimaginable to us today, people living in conditions we would now consider totally uninhabitable.

But what has really struck me are the descriptions of the common filth of everyday life. (To be fair, that’s not the focus of the book; there’s so, so much more to it, and I highly recommend it as a great read. But the dirty parts are what I’ve found riveting!) The vivid olfactory and visual pictures painted, of foul-smelling chamberpots in every room, unwashed bodies, “souring milk and ripening cheese,” beds “swarming with bedbugs” and heads full of lice, crowded sleeping quarters in hot, stuffy, unventilated attics (unheated and uninsulated in winter), open windows and doors offering no resistance to mosquitoes and flies, muddy yards, manure-stained boots and clothes … maybe it’s because I seem to have a more sensitive nose than most, but it’s hard to imagine. While we would allude to this at Plimoth, of course we also went to our homes each night with our hot water, showers, slept in clean beds each night and put on clean clothes in the morning; most of us weren’t noticeably stinky. The descriptions of earlier America, especially prior to 1800, portray a life that would be abhorrent to most of us today.

(I must confess, humorous thoughts immediately come to mind of modern mothers scurrying around their spotless households with a spray bottle of antibacterial cleanser, frantically trying to “protect” their offspring from Evil and Dangerous Microbes … studies are now telling us that pursuing the Holy Grail of the antiseptic home does more harm than good.)

Of course, there were the houses of the more well-to-do that were cleaner; having servants to fetch water and scrub and launder made life much more tolerable and pleasant. But that wasn’t the average American home.

Anyone who’s ever visited us here knows that we do not keep a spic-and-span household; having a farm, we regularly carry in dirt, dust, bits and pieces of vegetation and firewood on clothing and shoes and boots; three dogs and three cats contribute their share of fur and dust as well; and we are a bunch of overly-busy packrats, all manner of things collecting faster than we seem to be able to organize. We just try to keep the chaos tamped down. Even so, I can appreciate that our household is a thousand times cleaner than it would have been two hundred years ago, when this home was built by a blacksmith, water was carried from the spring, the lawn outside our door was a barnyard, and the nearest settlement of any consequence was a half-day’s ride by horseback.

And I’m really glad the bedbugs are long gone.

Monday, November 8, 2010

Overwintering Potted Plants


Maybe you’ve hit a few end-of-season sales at your favorite nurseries, but didn’t get around to getting the plants in the ground in time. Or perhaps you have some perennials in ceramic deck pots. There’s any number of reasons why you might have some potted perennials hanging about, and you’re not sure how to get them through the winter successfully.

For several years I’ve overwintered 100-200 potted perennials – some of them grown from seed the spring before, some are on their way to being large 2- and 3-year-old plants, and yet others are divided daylilies that will double by next summer. After reading all kinds of advice, talking with large nursery workers, and trying different methods over the years, I’ve found what works the best for me. Maybe it will be useful to you.

The types of northern perennials we’re talking about cannot be brought into the house – they need the cold/freezing temperatures of winter to go dormant. But potted plants tend to circle their roots around the outer edges of the pot, and so often there’s only a thin wall of plastic separating them from the cold, cruel winter world. Repeated freeze/thaw cycles can damage the roots; so can rodents, rot, all sorts of things. And, of course, if they’re in ceramic pots, as is often the case with deck plants, the combination of precipitation and freezing temperatures can crack and shatter the pot.

So here’s what works for me:
First of all, keep watering if there's little or no rain. It’s soooo easy to forget about this once the season winds down, but even as these plants are shifting into dormancy, the roots need that moisture. They are still alive, and dried-out potted plants freeze much more rapidly than moist ones, and suffer more easily. A dried-out plant will not survive the winter.

Once the tops die back, trim them back.

And then, once the weather has finally turned cold and you’ve had a good sharp frost, move the moist potted plants into a dark, unheated space; a garage, a shed, a barn, an unheated porch. The idea is to keep them frozen, or at least very, very cold, and out of the warming rays of the sun. You’re trying to avoid the thaw/freeze/thaw cycle that would occur if they were left outdoors. You can cover them if you like, but if there are any little critters around, they’ll gravitate towards that nice dark protected space and may well gnaw their way through the roots of the plants – at least, that’s what’s happened here in the past.

Yes, you can stack them one on top of the other to conserve space; it won’t hurt them.

In the spring, when the weather begins to warm and the perennials in your garden are showing growth, when the worst of the deep freeze is over, you can begin to move your pots outdoors again. This is a little tricky – there are always those spring snowstorms and freezes – but perennials are pretty hardy; just watch out for terribly frigid temps, and for precipitation followed by a freeze that doesn’t allow the water to drain out of the pots; that could encourage rot. I tend to move maybe a quarter of my plants outdoors at a time, spacing the migration over a period of several weeks, just because I’m on the cautious side.

Even under the best of circumstances, you might lose a few. But with the method I've described, I now get about a 90% survival rate in my cold Zone 5b -- I'm happy with that.

One more thing: the larger the pot, the better the chances of survival, I've found. Small plants with small root systems in small pots just have a harder time of it. It's not too late to plunk them into a larger pot, at least to give the roots more insulation.

Sunday, October 31, 2010

Fall Cleaning


End-of-season cleanup of perennial beds often seems like a chore, and there have been years where I just left it all (a la Ruth Stout) and figured I’d clean up in the spring (or not). No harm done, it seemed, except that all that vegetation is just so much more slimy and difficult to clean up after winter is over, and I’m afraid of stomping on the emerging new growth.

So nowadays, a few of the garden perennials are left for winter texture and for their seed heads that will attract the birds; but daylilies, in particular, seem to benefit from tidying up in the fall.

Always with an eye for other gardens, I’ve noticed that some gardeners cut their daylily foliage back right after the end of bloom. Most of the “experts” discourage that; as long as the foliage is green, the plant is still synthesizing and feeding the roots. In fact, cut the foliage TOO early, and the plant will send up new shoots – using up energy better saved for next year. But once the foliage yellows and browns, it can be removed.

So the photo at the top of the post is an example of a daylily that’s going into dormancy; the foliage is yellow and limp. Just take a pair of shears and cut the leaves several inches above the ground, and toss the leaves onto your compost pile.

It’s a great opportunity to remove weeds as well (because we got tired of weeding about two months ago, right?), and no doubt you’ll be surprised at how much some clumps have increased. And it's a good time to make a list of what will need dividing in the spring. AND to throw some compost into the beds, if you’re so inclined. Cleaning up the foliage makes that easier as well.

Friday, October 15, 2010

Grow your own!


We are big fans of garlic here, now that we grow our own. What a revelation it was the first time we harvested … big, beautiful purple-and-white streaked heads that seemed like a completely different animal from the store-bought stuff. And really, it is. The papery white heads commonly found in the grocery are soft-necked varieties, and nearly all of it is grown in California and shipped around the country. These are milder-flavored cloves, and for most people, the extent of their garlic experience.

And elephant garlic? – not really garlic at all. It’s actually the bulb of a type of leek.

It turns out that, while you will often read that there are hundreds of different kinds of garlic, recent DNA testing by plant biologists has determined that there are actually 10 separate, distinct varieties of garlic, with over 600 cultivated sub-varieties around the world. Five of these distinct major varieties are hardnecked types – and that’s what we grow. They tend to be the deeper, more flavorful types.

We bought our first “batch” from a neighbor who has specialized in big, beautiful, buttery-hot-tasting garlic for years, and have continued to set aside a number of the largest heads each year for replanting; selecting for the most “successful” heads improves the harvest year after year. I won’t go into detailed planting instructions – you can find that anywhere by googling – but if you want to know exactly how we do it here, just email me. It’s easy, actually; you plant in the fall, mulch well, and just wait for them to be ready the next summer. (One caveat: they really, really, really want rich soil, and if you don’t see to that, you will get smallish bulbs.)


And – bonus! – the hardneck varieties produce scapes in the spring, which make amazingly wonderful pesto, and stir-fry nicely as well. The scapes should be removed anyway, so that the plant’s energy will go into making the bulb bigger and better. Now that folks are becoming more familiar with garlic scapes, they’re seen more and more often at farmers markets. Scapes + oil + nuts + cheese = fabulous pesto; basil not necessary (but always good for additional yumminess).

Somehow, miraculously, our garlic has been planted earlier this year than ever before. There have been times when I was frantically getting it into the ground the day before a forecasted snowfall -- so it's not at all too late yet, if you're thinking about giving it a try.

Even if garlic weren’t one of the most delicious things on earth, its medicinal properties would make growing it worthwhile: it has antibiotic and antifungal properties, and has been used since forever to enhance health. But that’s another whole post sometime.

Monday, September 27, 2010

Rain at last!


All fingers and toes are crossed in the hopes that the forecast is correct -- two days of rain, perhaps as much as two inches; it's already drizzling out there. It's been a tough season for lining out daylilies; they get dug out of dusty, dry soil, and I wince for them as I pull them out of the ground. A nice soak before they're replanted helps, and of course good watering-in, but in spite of my "tough-love" beliefs, I've been watering them regularly after that as well.

Once again I can be grateful for a good supply of mulch; put on top of the new plantings, it helps to hold in the moisture and delay the drying effects of wind and weather. Next year's new raspberry row is being prepped as well with sheets of newspapers topped with thick mulch, so that weeds will be discouraged and digging will be easier next spring when we're ready to plant.


New daylily additions have been planted in the last two weeks: Persian Pattern (above), Colorful Summer, Neal Berrey, Martha Custis, Shishedo, Rose Emily, Byzantine Emperor, South Seas, Dublin Elaine (at top of post), Cherokee Heritage, Victoria Grace, Ruffled Apricot. Three of the older cultivars have produced proliferations -- tiny little clone plants located on blossom stems -- and so I am attempting to root them in the greenhouse.

Friday, September 24, 2010

It's Almost Over (well, not really ...)


The end of the growing season always elicits mixed feelings here, both for me, and I think I can safely say for my daughter-in-law as well; she too grows lots of veggies and fruits, and does some canning; we both fill our freezers with produce, soups, sauces, and pesto.
Residing in an area with the shortest growing season in the continental US, we find it hard to imagine living in, say, Florida and having to maintain this level of work for weeks and months longer. Knowing that our first serious frost will likely hit sometime in the next week or two is a relief, in a way.
And then, the cleanup. All the trellising that supported peas, green beans, tomatoes must be taken down; two or three dozen 6-foot-tall metal T-stakes have to be pulled and stored away. Pole bean vines have entwined themselves around the tepees so firmly that they’ll need to be cut away, and the poles stored. There’s row cover here and there, metal hoops, irrigation T-tape, wooden stakes, the assorted flotsam and jetsam of the growing beds to be cleared. A few rows have black plastic that needs to be taken up. The browned, dried remains of all those corn, cucumber, tomato and squash plants will go into the field compost pile, along with the mounds of weeds we’ve been pulling.
Kale, broccoli, carrots and lettuce can stay in the field for awhile longer; light frosts won’t bother them, and will actually sweeten the kale. Once there’s a row that’s been cleaned, composted, and tilled, next year’s garlic will be planted and mulched. And we’ll see how long we can keep the greenhouse tomatoes and peppers going – it would help if the broken door was replaced!
Ideally, we’ll be spreading lime and some other soil amendments this fall; ideally, I’ll be tilling and sowing some winter rye. But we’ll see. Weariness outweighs motivation at this time of year, and it’s soooo tempting to just put things off until spring. But despite thinking that this season was not so great, with the heat and dryness, I find that the freezer is indeed full again and there’s much to be thankful for.
Yet I haven’t even mentioned prepping the daylilies, the perennial beds, or the potted plants for winter! That’s another post for later.
Meanwhile, thoughts turn to quilting and knitting ...

Sunday, September 19, 2010

Garden Design on a Dime


Spring and fall are the seasons for dividing and transplanting, making changes in the garden. I’ve got a big, long list of what to move where, and have been chipping away at it now that the weather has grown cooler.

But there’s a world of difference between having a knack for growing things, and having a talent for garden design. I’m good at the former, not so great at the latter. Despite studying all those books and magazine articles, even the diagrams in seed catalogs that promise you the “perfect” garden, I’m still missing something.

Sometimes, I think it’s disposable income. The “instant” garden that’s put in by a landscape designer begins with a clean slate, and requires a serious cash infusion (not to mention a small army of workers to make it all happen). Have you seen the price tags on those beautiful flowering specimen trees and bushes? Or figured out how much a lovely winding path of peastone or pavers will cost, from excavation to the finished product?

More often, if you’re like me, we look at what we’ve got already and see what improvements we might be able to make on a limited budget – sometimes so limited that it means just moving things around in the hopes the garden will look better, like rearranging our living room furniture. It also requires being able to foretell the future, having a vision of how big that Echinacea or tickseed is going to be when it matures in two or three years … will it be too large for that spot in the garden? And, let’s face it, there’s more to it than just putting the short things in front and the tall things in back, or having a color "theme."

For years I succumbed to the impulse to purchase a pot of one thing or another that I liked, but since I never could afford more than one or two at a time, my gardens were a jumble. Then we moved, and I inherited perennial beds with great swaths of certain flowers, with repeated plantings at intervals, with tall non-flowering accent plants in the background, and I saw what a difference that made. Still, those gardens were typical straight-edged border beds. Now there are some new beds, curvy-edged; works in progress, they are. I’m still learning. But I think it's looking a little better each year.

Sunday, August 29, 2010

End-of-Season Overload

Each August, I tell myself that next year I will make sure to take some vacation time from my outside job at this time of year. And every year, I forget to. There is such an abundance of produce harvested at the end of the summer that it seems like a full-time job to deal with it. A nice problem, to be sure, but still …

Right now: the first planting of broccoli is already in the freezer, about 16 bags’ worth, and the plants are still sending out side shoots. The second broccoli planting is still a few weeks away from harvest. Green beans are coming fast and furious – I planted less than half as much as usual this year, four varieties on two six-foot-tall tepees, but it’s still more than I can keep up with; some go in the freezer, some to relatives, lots eaten raw for snacks. Cucumbers are crazy this summer! – abundant and delicious – we eat one every day, we hand them out to family and friends, the chickens get some too. We’ve got corn on the cob on our supper menu nearly every day now, and there will be plenty to put in the freezer very soon. Collards are so easy – they’re cut into one-inch pieces and tossed into freezer bags, no blanching needed; later they’ll be tossed into soups for extra nutrition. And the melons! – sweet, fragrant, delicious muskmelons this year, the best ever thanks to the hot summer; lots of them go into the freezer, cubed, for winter treats.

And what a year for hornworms! There were days when we were picking off a dozen or more at a time, and tossing them to the chickens. Not only did they go after the tomatoes, but the peppers as well, stripping the leaves and exposing the fruit -- which they'd munch on as well (see the little hole in the pepper in the back?). Now that the nights are so cool (often in the forties), the worst seems to be over.


My current favorite recipe uses what’s in season right now, and is flexible enough to accommodate new items at any time. It’s a roasted dish: zucchini, summer squash, tomatoes, peppers, onions, garlic, kale, all chopped; oregano, basil, winter savory; all mixed with olive oil and just a wee bit of balsamic vinegar (which REALLY punches up the flavor). Popped into a 350 oven for 30 minutes or so, then served with either feta or Romano or Parmesan cheese sprinkled on top, it’s sooooo delicious!

Saturday, August 7, 2010

Why Bigger is not always Cheaper

Recently we traveled a bit on a rare day off together, my hubby and I, to a daylily farm in another state. Not only is it just the sort of thing for a daylily obsessive like me, but it’s also part of our continuing effort to observe how other farms and nurseries go about the business of growing and selling daylilies and other perennials. And walking amongst six acres in bloom is like being in heaven.

We had been to this place a few years ago, and had been a bit startled at how relatively high their prices were. This time we looked at the situation in a more analytical way, comparing it to our much-smaller operation.

Overhead is much higher for them, clearly. They have thousands of varieties, and numerous employees; they’re open seven days a week in peak season. Wages, Social Security, FICA, unemployment and worker’s compensation insurance – all that is considerable, and probably their biggest expense. A simple but spacious custom-built outbuilding/office/store, specialized software for the cash register that spits out a receipt telling you exactly what you’ve bought and the statistics on those varieties, several large greenhouses, and a large hybridizing program all cost plenty. There are mowers, tillers, assorted specialized tools and equipment to maintain so many beds and grassy paths; irrigation systems, and the gas and electricity to power it all. There’s a mail-order department with phones and computers, advertising, a beautiful printed full-color catalog, and no doubt more that we’re not even realizing. Whew. No wonder their prices are higher!

And I don’t begrudge them that at all. A farm/nursery like theirs is a “destination” as well, a place of real beauty out in the country where you can spend hours strolling, enjoying the flowers, sitting at any of the many tables and benches shaded by umbrellas. I, for one, have to be nearly physically dragged away when it’s time to go.

As for Dhabi’s, though, I don’t have any desire to grow my business even half as large as that. The “vision” here is to perhaps double in size from where we are now, to perhaps 350-400 different daylily cultivars, and to keep it a small, friendly, family-run nursery with low overhead and correspondingly lower prices. Keeping it simple – yeah.

But, of course, I reserve the right to change my mind at any time ;-).

Here's a few photos of some of the new ones we picked up:

Dottie Warwick

Obsidian

Monday, August 2, 2010

Quick trip to the Big City

So this little country mouse traveled to the Big City today and lived to tell the tale. No, this has nothing to do with gardenfarming, really … except that this is how I spent my morning, instead of weeding, watering, and lining out daylilies.

Up at 4 am, we were, so that I could get my daughter to Logan for an early flight. No big deal, it would seem, especially for someone who used to zip on into Boston regularly for museums, shopping, entertainment, classes, seminars, back in pre-farm days. But seven years of country living has wrought some changes in my perceptions.

The traffic, for starters … four lanes in each direction of bumper-to-bumper shiny SUVs! All that speeding and weaving, all those near-misses! My heart was in my throat … I’m now more accustomed to slow pickups heavily laden with hay, to lightly-traveled roadways, to, shall we say, more polite drivers who aren’t in quite so much of a hurry and who aren’t driving vehicles equivalent in cost to a small New Hampshire home. (And while I was desperately trying to hold my own in that seething muscular river of metal, hoping to maneuver safely into the correct lane and make my exit, I was catching snippets of the radio news … “drug war” … “severed heads” … “car bombings” … adding to the feel of having stumbled into some dystopian alternate universe.)

Finally, the airport, with its choking atmosphere of jet, truck, bus and car exhausts that burn the throat, with signs everywhere insisting “Absolutely No Parking” at the dropoff, and warnings that your car may be searched; the $3.50 charge (wasn’t it $1.00 just a few years ago?) to drive through the Callahan to get outta there and head back north; the gas stations charging .20 more per gallon than we pay up here in the sticks.

Of course people live, commute, and work in that environment every day and many love it. I don’t. While the city has its charms (none of which I was able to savor on this particular trip), I was relieved to head north again and reminded how fortunate we are to live in this slower, quieter, relatively unspoiled and friendly place. Heading over Pitcher Mountain with no other vehicle in sight, I was once again knocked out by the three-state view of mountains and forests, shaggy horned cows grazing in the fields alongside the road. A graceful white egret was poised on a rock in the Ashuelot as I followed the winding river road into my little town. And when I pulled into our own driveway, the farm looked even better to me than when I left. Nice to be back home.

Saturday, July 31, 2010

Hot, dry, and over too soon ...


Here we are at the end of July, when normally there is still an abundance of daylilies in bloom. After talking with other gardeners and nursery growers, though, it’s clear that what I’m experiencing here is the norm in this region – most of the blooms have gone by already, and great swaths of the gardens are nothing but foliage.

There’s a friend who always goes away at the beginning of August, and cuts all her blooming daylilies first to bring them with her; she has none left to cut this year. Another gardener has pointed out that so many things are way ahead of schedule … goldenrods in bloom, an abundance of monarchs, the nesting of certain creatures, acorn drop. I can hear the insect sounds of late summer, and keep thinking that it’s the end of August, from the feel of things.

This leads, of course, to worried speculation about the coming winter, as if there’s some connection to be made. Maybe there is, but we mere mortals cannot divine it yet. That doesn’t stop us from fretting that it will be early and severe. Indeed, more extreme weather seems to be the norm these days, and certainly we’ve heard that same prediction for the future. The National Climatic Data Center says that June 2010 was the warmest since record-keeping began in 1880; both NOAA and NASA rate this year’s January-to-June as the warmest such period on record. And, of course, rainfall’s been in short supply this summer as well … not a banner year for gardens, that’s for sure.

Xeriscaping is the art and science of using drought-resistant plants in the landscape, and daylilies fill that bill, along with many of the other perennials we grow here. The vegetable beds have drip irrigation, which uses only 30% of the water of overhead sprinklers. The newly-planted fruit trees and bushes have needed supplemental watering all season, without established deep root structures. And the greenhouse, full of pepper and tomato plants, has needed hand watering every day during this long hot summer. Such a difference from the wet summer of 2009!

Tuesday, July 27, 2010

Deb's garden


Having a big old farmhouse with an oversized lawn and garden beds spread all over, I’ve tended to plant taller daylilies with larger blossoms. Proportionally, it makes sense, and since my gardens tend to be an overgrown riot of mixed flowers and herbs, like English cottage gardens, the blossoms don’t get visually lost so easily.

But my friend Deb has a different situation and a different sensibility; a lovely smaller house in the city, with perfectly manicured, curving garden beds. Deb particularly loves the smaller pastel daylilies, tends them lovingly, knows them all by name, keeps the clumps from getting too large, and gives them breathing room. With her artist’s eye, she carefully juxtaposes them with a variety of striking hostas, ferns, other perennials, and unusual trees and shrubs. And as her daylilies increase, she shares her bounty so generously with her friends … the smaller daylilies in my collection are nearly all varieties that she has given to me at one time or another.


Deb also has a lovely habit of floating one or more daylily blossoms in a shallow dish of water, bringing them to the table where perhaps for the first time each one can be closely examined and admired at length. It’s one thing to gaze appreciatively at a lovely garden scene; it’s another to look, really look, at one blossom close up, daylily or any other. Flowers are utterly amazing, as could be said of pretty much any of Mother Nature’s creations, don’t you think? It’s rare that we take the time to focus in that way, though, and I’m grateful to Deb for drawing attention to this level of appreciation of nature. And I’m always grateful to have gardening friends who are all about daylilies too.

Saturday, July 24, 2010

Mail-order mistakes --- grrrr!

For the last five years or so, I’ve been ordering many daylilies by mail. Of course I love to visit other daylily farms in person, too, and purchase some that way as well; but I don’t want my collection to be simply a repeat of what the other area nurseries offer. Many of my cultivars have come from farms in Wisconsin, Oklahoma, Illinois, Virginia, New York – you get the idea.

But oh, how frustrating it is to me when, after waiting a year for a new-to-me plant to bloom, it turns out to be NOT what I ordered. And it’s amazing to me how often this happens.

Just this morning, the long-awaited first bloom of Lady Neva opened. I was eager to see this “tall, soft buff yellow with rose eyezone” spider at last. But what I got was a short, bright yellow-orange self, and not a spider. Obviously, the wrong daylily – again.

Sometimes I’m delighted with the “wrong” daylily, and just keep it (actually, only once! – that one became Maison Rouge, a deep coral/red beauty, in the photo here). Usually I notify the seller that they made a mistake, and I’d like what I paid for, and offer to send back the mislabeled fans. Most of the time the sellers rectify the situation – some begrudgingly, some with sincere apologies. One seller never responded at all. (Makes it easier to know who NOT to buy from next time!)

Certainly it’s challenging when you’re digging daylilies for customers, and not all of the scapes have open blossoms; it’s important to tag each plant as you dig it, and to pay attention to make sure you’re packing up the right order. Being human, we all make mistakes. But also having been on the customer side of this situation many times, I am pretty persnickety about making sure my customers get what they ordered.

Since I’m kvetching about mail-order, I’ll add one more pet peeve: sellers who alter their photos via Photoshop to the point that it’s no longer “what you see is what you get.” For example, I ordered an Oliver Dragon Tooth awhile back, admiring the lovely white-and-purple blossom in the photo; the real-life Oliver is actually mauve and purple. Now I know to do a Google image search first, and see what shades predominate in the results.

Wednesday, July 21, 2010

Beneficial bugs


The other day I noticed a blurb on the cover of a popular back-to-the-earth-type magazine that shouted something like “Insect-Proof Your Garden!” Knowing this is another one of those headlines that promises more than it can deliver, I looked inside; sure enough, the article was all about the magic of having an insectary in your vegetable garden.

What’s that, you ask? Well, the idea is this: certain blossoms are known to attract beneficial insects, the kind that prey on the nasty bugs, slugs, mites, thrips, caterpillars and other baddies that gnaw on your carefully-tended veggies. It makes sense, then, to plant some of these flowers in or near your vegetable beds, therefore creating an “insectary,” an area that offers habitat, shelter, and an alternative food source for the good guys.

We did just that several years ago. The photo shows our insectary row on the left; bee balm, Shasta daisies, and rudbeckia were in bloom at the time. In addition, the row contains coneflower, lemon balm, yarrow, thyme, tansy, bronze fennel, angelica, and more; annuals often include sunflowers, cosmos, and cleome. Umbelliferous flowers – ones with umbrella-like blossoms, such as dill and Queen Anne’s lace, are particularly good ones for this purpose. You don’t need a huge assortment – half a dozen different types offer a variety of attractions, and they can be grown from seed.

Certain plants are much better than others for this purpose; google "insectary" to learn a whole lot more.

But, let’s get real: an insectary will not “insect-proof” your garden. Nothing will do that. It can help lessen the impact of the undesirable bugs, for sure; although I cannot measure it, it seems apparent to me that we have noticeably fewer insect issues since our insectary was established. It needs only weeding, and not too much of that if you mulch the plants well. And, perhaps less practical but certainly enjoyable, it adds beauty and color to the vegetable patch. What’s not to like about it?

Wednesday, July 14, 2010

Seaward


Lately I’ve been hearing the call of the sea, and that’s something that surprises me. I’ve always thought of myself as a forested-hills-and-mountains country girl; during the many years I lived on Cape Cod, I never felt at home, and always missed the north country.

Don’t get me wrong; I’m not unhappy living here. It feels right to me. But a number of times this spring and summer, I’ve felt a longing for the coast. A few times I’ve heard some noise or other that sounded eerily like a foghorn, and I’ve been transported; a few times I’ve sworn I’ve smelled salty air. Never one for the daytime beach after skin cancer cropped up on my shoulder years ago, what comes to mind are the evening beach and canal walks, the boats, the historic towns that lie along the shore, quaint cottages with sweet little gardens bordered by picket fences, the tumbling rose bushes along the edges of yards and climbing up onto arbors.

The beach beckons to my daughter, who goes back several times a year as much for that as visiting family; my husband, a former tuna fisherman and Coastie, misses being on the water. But we know the coastal life we’d like is not available to us. Land is terribly expensive there, especially if your heart cries out for a small farm, and the days of living quietly by the sea are long gone. As the years went by on the Cape, more and more houses, big box stores, and multiple-lane highways were constructed; it’s irrevocably changed into something I don’t care for.

But a little vacation further up along the New England or Nova Scotian coast might be just the thing. After daylily season is done, of course.

Monday, July 12, 2010

Seedlings Part 1


So far, there are three, maybe four seedlings this year that seem to have some real “possibilities.” Just don’t ask me to define that too extensively yet! My disclaimer, in case anyone should assume differently: I am very much an amateur in the world of daylily hybridizing and seedlings, and learning as I go.
That said, I’ve been avidly reading online postings by professional hybridizers for some time, and whatever articles I can find on the subject. As with anything, there’s a lot of fact and opinion, and often it’s hard to tell which is which. And have I mentioned yet that I’m new at this?

So let’s begin with the deep rose seedling at the top, called 08Q3 for now. Parents are Mary Alice Stokes (red rose bitone, 25” high, averages 24 buds) and Darla Anita (lavender, 30” high and 40 buds); seed came from a hybridizer. This looked nice last year when it first bloomed, and even better this year. It’s 23” tall, and has already multiplied to 3 fans, but only one scape so far; 2-way branching and 8 buds. Not spectacular vigor, but okay. I’ll soon move it from the seedling bed into a nursery bed where it will have more room to grow, and we’ll see if it grows into more of the bud habits of its parents. So this one is, I think, a “maybe.”

The next picture is a sibling of 08Q3, 08R3, taken last year and showing some promise. It hasn’t bloomed yet this year. (Clearly I haven’t figured out how to insert my photos where I’d like to, and they’re still all clumped together in the beginning of the post – sorry!)

Next, the salmon-pink seedling (the photo isn't showing its true color), numbered 08Z2 in my records. It came from seed I purchased from a hybridizer, with San Simeon as one of the parents. And this is one occasion where the offspring seems to look identical to the parent – because the hybridizer said he “crossed” San Simeon with itself. I have no idea how this is regarded in the world of hybridizing, as I haven’t read about it anywhere; is it actually SS, like a division would be? Or is it considered a “new” cultivar? I’ll have to ask some people in the know. In any case, SS is listed by the AHS as being 25” high with a 5.5” blossom; mine is 22” and 5.5”, perfectly acceptable for a 3rd-year seedling in a different location. It’s got only one scape, with 9 buds – so this one, too, will be watched for another year, but I’ll probably keep it just because it’s already got decent height, a beautiful face, and has opened perfectly.

Which leads me into how so many seedling blossoms don’t. I’ve read that you really need to give them several years, that you shouldn’t go by the first blossom to open, and so on – but some seedlings just have poorly formed flowers, or don’t open completely, or other oddities. Or they’re just plain unattractive. I’ve got one that has never opened a blossom completely; they just get hung up about halfway through the process. It gets another year to improve, but if not by then – into the compost. And another that I was SO excited about last year didn’t even throw up a scape this year – obviously not a vigorous plant at all! The most vigorous seedling so far has multiplied into 10 fans with 2 scapes, and while the flowers are a pretty color, so far they’re all imperfect in some way. I’m giving that one another year, too.

More later as more seedlings open their blossoms.

Saturday, July 10, 2010

The Big Fix for the Wet Yard


Our house, lawn, and gardens are situated close to the bottom of a very large hill. In fact, most of our part of town is a series of hills that cascade down to a deep gorge through which the Ashuelot River twists and turns. While it’s lovely and all, it also means that rain and snow – and we normally have a fair amount of each every year – drain downhill and into our yard, creating swampy boggy areas. Even at a time like this, when we’ve been two weeks without any precipitation and suffered such heat, the outer edge of our yard would often be so wet that the mower got stuck from time to time.

Thanks to some wonderful serendipity, our son is a landscaper. On a fiercely hot afternoon last weekend, he offered to remedy the drainage situation and spent several hours expertly operating an excavator, digging and shaping a swale. What’s a swale, you ask? – I had to ask the same question! The best way I can describe it is a long, narrow bermed ditch, designed to slow and capture runoff. Taking the slope of the land into consideration, he built a deeper drain pit at the lower end, with gently angled edges.

The plan is to sow the exposed sides of the swale to clover, rather than let the local weeds totally insinuate themselves. By summer’s end, it should be green again.

Now here’s the part that proves to me that I’ve married the right man: my husband, surveying the nicely finished swale, suggested that the very long lawn edge – probably close to 150 feet long – should be turned into a long border of daylilies. Who am I to argue? My guys are great!

Wednesday, July 7, 2010

Dog Days


As much as I could rave on about each and every daylily that’s opened so far, what’s uppermost in my mind (and nearly everyone else’s, it seems) is the heat. And the ones that seem to be suffering the most, at least in my immediate purview, are our two Berners.
Bernese Mountain Dogs are incredibly sweet, gentle, wonderful beasts … and definitely built for cold weather. Originating in the Alps, they like nothing better than to roll around in snow; our northern winters don’t faze them a bit. They’ll come up to the field with me on summer mornings, after some encouragement, and seek out a shady spot. But this hot, humid spell is really hard on them, and they just can’t stay out there very long. We don’t have A/C here at home, just a few fans, and during this heat spell Marley and Geneva are slow, panting, nearly immobile after 9 a.m., even in the house. Devoted critters, instead of always seeking out the coolest spot, they rather will stay with me, even if I am in the warmest room. Poor things! And so this is how I rationalized spending a few hours in front of a fan, watching insipid tv this afternoon … it was for the dogs. Of course!

Saturday, July 3, 2010

Open Garden Plant Sale Sundays


Way back in the early spring, we looked at our work calendars and at daylily bloom records from the last few years, and decided to open to the daylily public on Sundays in July. We didn't notice that the first Sunday was the Fourth! -- and so while we officially start our season tomorrow, we're not expecting much in the way of traffic. And that's okay; the last-minute scramble is still underway and we still have plenty to do ... finishing some of the bed signs, some of the walkway trimming, some of the cleanup around the greenhouse. The list is long. We don't mind easing our way into this!
Each day, more and more daylily buds are opening ... here are some photos of some of the ones in bloom now, with lots more to come ... top to bottom: Grand Ways, Atlanta Moonlight, Maison Rouge, Shango.

Thursday, July 1, 2010

Greens 'n Things


If you’re into kale at all – I mean, even slightly – I can’t recommend Beedy’s Camden highly enough. In the past we’ve grown the Russians, red and white; Lacinato/Dinosaur; Winter curly; others I can’t remember … each of them did well enough. And then we met Beedy’s.

Selected by a farmer in Maine and sold through Fedco, this variety fairly jumps out of the ground and just keeps growing apace all season, pushing out large flat-and-curly leaves that are tender and delicious. Half a dozen seedlings went into the kitchen herb garden for those last-minute additions while cooking; the rest are up in the field with the other crops. Kale can be cut into pieces, tossed in a bag and frozen without blanching for winter soups and stews – easy to do – and you will likely have plenty extra for freezing if you grow this prolific variety.

For some reason, lettuce grows really, really well here; maybe it’s the type of soil we have, or the particulars of this mini-climate, but the heads grow to an enormous size while staying crisp and tasty. If I were into monoculture, this would be a lettuce farm! This spring we’re enjoying Black Seeded Simpson, Buttercrunch, Forellenschluss, Italienischer, Really Red Deer Tongue, and some volunteers from the varieties I let go to seed last year; there are Batavian seedlings waiting for their turn in the field for midsummer eating. Taking a note from my Pilgrim days, onions are planted in amongst the lettuce seedlings right from the start – they don’t compete for the same “air space,” and the lettuce will be gone fairly quickly while the onions take much longer.

Friday, June 25, 2010

And so it begins ...


Although there might be one or two, or several, other daylilies that open up a blossom first, Cape Cod Cousin is the one that really kicks it off for us; maybe because for so many years, it was our earliest, and the one whose buds we kept watching with anticipation.
This year's strange spring weather led us to think we were going to have an early season; we scheduled our first Open Garden Day a week earlier than we might have, and then three swift late frosts set everything back. Wisely, we held off on advertising, and now realize that there are not yet enough daylilies in bloom to open this Sunday ... nobody wants to come and look at a forest of foliage! But oh, there are hundreds and hundreds of buds quivering with promise, and we expect by the following weekend we'll be able to fling the doors open (figuratively, of course).

Tuesday, June 15, 2010


How many seedlings would you be willing to plant in the hopes of finding one special new hybrid? 10? 100? 1000? more?

The “big names” in daylily hybridizing typically make hundreds, maybe thousands of crosses and plant hundreds of thousands of seedlings each year. This, of course, requires acreage and employees and usually, a location south of the Mason-Dixon line.

But there are loads of backyard daylily growers who have a keen interest in hybridizing as well, who necessarily grow smaller numbers of seedlings, and sometimes produce a hybrid special enough to be registered.

Like so many, I started simply planting the random crosses accomplished by the flowers themselves. Those seed pods you find at the end of the season contain shiny black seeds, and if planted, many of them will germinate. The more varieties of daylilies you have, the more potential for each of these seeds to produce new and different varieties. Here in the north, seedlings will not flower the first year; this is one of those endeavors that helps to develop patience.

Most of my first batch of seedlings flowered in the second year. Like any new mother, I was entranced with my new “babies” – well, some of them, anyway! Experienced hybridizers advise waiting until the second or third year of flowering to really see what you’ve got – requiring even more patience *sigh*.

The next logical step was to purchase seeds from experienced hybridizers … and so I did. Some of those began flowering last summer: curly ruffled edges, interesting colors … whetting appetites to see what they’ll be like as second-year blooms.

Presently we have about 400 seedlings in various stages of growth. Not that many, in the world of daylilies, but more than enough to weed and fuss over. Watching them send up their first scapes is like looking at all the presents under the Christmas tree, wondering what's inside each one. Won't be too much longer now!

Monday, June 7, 2010

Little Kitchen Herb Garden


My definition of “herb” comes from having worked at a 17th-century living history museum, Plimoth Plantation, where pretty much anything other than field crops was given that appellation. Lettuce, sorrel, spinach and burnet were “sallet” herbs, and the kitchen gardens were filled with all manner of edible and medicinal plants.

When I moved to this old farm seven years ago, I planted a large herb garden, bringing slips of many of those old-fashioned herbs with me – elecampane, lemon balm, wormwood, rue, teasel, tansy, comfrey, and so on, along with the more typical kitchen herbs. This good-sized bed is perhaps 100 feet from the house; call me spoiled, but it seemed awfully far on a cold evening or a rainy day to dash out and fetch a handful of this or that while cooking.

And so a more functional kitchen herb garden was born, just three or four steps from the kitchen deck. So much better! Here I keep the perennial culinaries that I use – sage, thyme, chives, winter savory, oregano, sorrel, salad burnet – and plant the annuals that are often plucked just a few leaves at a time: spinach, kale, basil, cilantro, rosemary, bronze fennel. During the winter, our coffee grounds are easily tossed into the annual beds, and a layer of finished compost in the spring keeps everything happy.

Thursday, June 3, 2010

New farm workers have arrived!


Last night, under cover of darkness, eleven imported farm workers were slipped into their new quarters here on the farm. This was done stealthily, of course, in order not to disturb the old hands who were already sleeping soundly … the fewer dustups, the better.

A friend of a friend is moving south and needed to find a home for her one-year-old hens … and that’s exactly what I was looking for, hens who are still young but already laying. A perfect match! Besides the wonderful fresh eggs for both table and sale, we benefit from the rich combination of coop shavings and manure that gets composted and added to our growing beds.

Our “old” girls – three years old, now, and ten in number – are Barred Rocks and red hybrid layers; these new hens are White Brahmas and Red Comets. The time-tested way to introduce new additions to the flock is to wait until everyone’s asleep, slide the new ones into the coop, and when they all wake up in the morning, there’s minimum fuss. Early this morning we heard some louder-than-usual squawking coming from the direction of Coop de Ville, but by the time we climbed to hill to take a look, all the ladies seemed to be just hanging out.

And then – a faceoff in the pen: a heavy young Brahma versus an aging Red. Size and youth won out (*sigh* -- what happened to experience and cunning?), and the Red suffered some minor lacerations. Thus a new pecking order comes into being. Regime change can be a bit messy.

Only 10 eggs were collected today, but since everyone’s got eggs in the pipeline, we’ll hope that they’ll settle in and resume normal laying soon.

Tuesday, May 25, 2010

If it's not hardy, it's not worth it!


Diehard gardeners usually love to encourage others to get their hands in the dirt, hoping they'll see how rewarding it is. And there’s nothing like a successful experience to really bring pleasure. Which is why it breaks my heart a little whenever I hear of a gardening “failure” that could have been avoided … like the folks I know who planted their veggie seedlings out waaaaay too early last spring, and lost them all to frost; or the rose bush planted in such poor soil that it conked out pretty quickly. Heaven knows I’ve made plenty of mistakes myself over the years … or, perhaps I should say, I’ve had plenty of learning experiences.

And so, instead of harping on why you should plant daylilies that are 1) purchased from a grower in or near your climate zone, and/or 2) known to be good performers in your part of the world, here’s a visual aid to illustrate the point.

Several years ago, I ordered several daylilies that I knew were northern-hardy from a southern grower. Along with my order, they included a bonus … one of their newer hybridized introductions, which lists for $75 in their catalog. Wow!, I thought, that’s amazing! -- I figured it would be quite special.

Here we are, three years later. You can see that the daylilies on the left and right have normal-sized foliage for this time of year; and you can see that the ones in the center are small, thin, and grass-like. That is the three-year-old “clump” of the $75 introduction, a Zone 5-inappropriate daylily, bred to live in the South. Oh, it survives here … barely. Last year it threw up only one blossom. If I didn’t know the reason, I would have been tremendously disappointed … and if I had spent $75 for the plant, I would feel even worse.

So buy what will thrive where you live. Spend wisely. Be happy. And have a beautiful garden!

Tuesday, May 18, 2010

Lovely little blue invaders


Many years ago … back in the distant past … I visited the Green Briar Nature Center at the Thornton Burgess Museum in Sandwich, MA (http://www.thorntonburgess.org/GreenBriarNatureCenter.htm), and was struck by a carpet of blue forget-me-nots (myosotis) that stretched away at great length under a large old spreading tree. Knowing nothing about this flower, I imagined that this particular bed had probably taken many, many years to reach that size. The blue carpet looked so lovely, and I tucked the memory in the back of my mind, hoping to create something similar some day.
Little did I know how quickly these little gems spread! Several years ago I brought one clump home. Now they have multiplied exponentially, literally choking the other plants in four of my garden beds. I still love their beauty in early spring, but during the last week have had to pull two wheelbarrows full for the compost pile, as well as giving away as much as I’ve been able. These photos were taken after the thinning … the poor daylilies needed some room to breathe.

Tuesday, May 11, 2010


Do you ever get wistful at the start of the school year? Do you remember the excitement of being a kid with a new outfit, a new pencil box, a new teacher? (Okay, maybe I’m dating myself with that pencil box, but you get the idea …)

That’s how I’m feeling right now at the start of Farmers Market season. Having been a market farmer for about five years, and having “retired” from that particular endeavor, I have mixed feelings as I see the opening announcements in the newspapers and the signs on the street. Like most endeavors in life, going to market offered a mixture of pleasure and difficulty; it offered its own little community of growers and vendors, by and large a terrific group of people; and chewed up an enormous amount of time.

Wait a minute, you might be thinking … market lasts for only four or five hours or so, right? Well, that’s how it looks to the customer. But prep begins the night before, with many hours of harvesting, trimming, washing, bunching, weighing, bagging, loading the truck. Starting before dawn on market day, the flowers are cut and made into bouquets, the salad greens, kale, and basil cut, washed, dried, and bagged for maximum freshness. It’s best to arrive at market an hour before opening; there’s the canopy and tables to set up, all the produce to unpack and put out, price tags and bags and scale and cash box (each of which can be forgotten on any given day, resulting in a last-minute scramble). There’s the search for one last cup of coffee before market opens … very important! And then, of course, sending your fresh produce home with happy customers. Seeing the same faces coming back to your booth every week means you’re doing it right.

The aftermath is the hardest part. Bone-tired, you take everything down, repack the truck, and then travel back home; unpack it all, clean out the coolers, put it all away. It’s really more like a twelve-hour day. Lots of market farmers do this twice or three times a week, meaning less time to do the actual farmwork. One farmer friend, who does three markets a week, regularly works in his fields into the night with a headlamp clamped on. More than once, he’s fallen asleep out there.

If market prices sometimes seem higher than the grocery store, don’t for a minute think that your local farmer is getting rich; he or she is likely just getting by, but is offering you the freshest, most delicious and nutritious produce you can find outside of your own garden. One of my favorite bumper stickers says, “Support Your Local Farmer, or Watch the Houses Grow.” Go to market, hit the farmstands, grow your own … it’s all good.

Monday, May 3, 2010

Plant Swap Tonight!


Gardeners seem to be such a generous and open community. It helps that no two gardens are alike, that we are always curious about the blooms behind the fence or around the back of the house, what magical combination of seeds and soil and fertilizer has produced such outstanding lettuce or tomatoes. And when our perennials keep increasing, as they will, we are happy to divide and share.

Here in my little town, there’s an annual “Plant Swap” event that’s eagerly awaited. In early spring, we gardeners gather in the church basement, lugging pots and boxes and various containers holding the surfeit of our spring divisions; the tables will groan under their weight. It’s a little reunion of sorts after a long winter, catching up with one another, making new acquaintances; it’s especially gratifying to see new young homeowners eager to fill out their gardens, and even younger people with a budding interest in growing (pun intended – sorry!).

With great humor in some cases, each person will take their turn offering their plants one at a time – describing the name, color and habit and preferences, if known; once in a while, someone will admit, “I have no idea what this is, but it’s got a pretty flower.” There’s nearly always someone who can identify it. And usually there is more than one person who wants to adopt the plant in question, which requires the use of slips of numbered paper and a hat … this is all prepared ahead of time by the wonderful ladies who put on the event, and results in cries of joy by the winners and a feeling of being at a bingo game.

Me, I’m always looking for the daylilies, of course, but I’ve come home with peonies, daffodils, scented geraniums, Jacob’s ladder; I seem to bring the usual things to give away every year, worried that everyone’s already got them by now, but they’re always happily taken. Then the search is on for some little space in an already-overcrowded garden where the new treasures can be tucked in. Even better, though, is the expanding sense of community that we share, the opportunity to meet new folks and get to know the not-so-new ones a little better.

Friday, April 30, 2010

In the beginning ...


There are casual daylily fans who have a few Stellas or ditch lilies here and there in their yards; there are daylily obsessives, who grow many hundreds or thousands in meticulous showcase landscapes, know the names of every single cultivar they own and many they don’t (yet), and spend upwards of a hundred dollars for a single newly hybridized cultivar.

And then there’s everyone in between (probably the majority of us). I suppose most of us start out with having our eye caught by a particular blossom or two; for me, it was driving past a little daylily nursery farm on a narrow winding road on the north side of Cape Cod, years ago. I stopped to look, and that’s all it took.

Such colors! Such variety! Such lushness of foliage, abundance of blooms … I would go there once a week during the season, after getting my paycheck, and buy one or two. It would take me forever to select them; around and around the beds I went, wanting many more than I could possibly afford, trying to narrow it down.

The grower was a very large man named John, smoking and sweating and heaving himself around the beds as he dug up my choices, making me fear that he could have a heart attack at any moment … but his love for the flowers was infectious, his self-deprecating cheerfulness endearing.

I remember his excitement over one daylily in particular named Cookie Monster. He convinced me to buy it before any of the blooms had opened yet, trusting in his description of the multiple shades found in a polychrome. And he was right. It’s still one of my favorites, all these years later.

If you’re a daylily lover, or a collector of another type of plant, how did you get started? I’d love to hear your stories too.

Wednesday, April 28, 2010

Spring showers?


Yep, that's snow ... it's a late-April surprise, especially with the early spring we've been enjoying this year. Mother Nature's way of reminding us not to get too far ahead of ourselves, perhaps. It's coming down thickly as I write this, but it's really just a blip, predicted to turn to rain shortly. It doesn't even feel cold enough to snow out there, and the bird chorus is as cheerful as ever.

Here in Zone 5, our last average frost date is May 22. If my gardens had a southern exposure, or were somewhat protected, or in town in the valley where it's usually about ten degrees warmer than here, I might be willing to set out tender seedlings as early as some do; but this snow reminds me that here in the hills, things are much more variable. The spinach and kale will be fine, but we'll go up the hill to the field later to check on the lettuce seedlings -- with fingers crossed.

Friday, April 23, 2010

Dividing hostas step-by-step


So many of us who grow daylilies have hostas as well. They don't automatically go together, if you think about it -- daylilies do best in sun, and hostas are generally shade plants -- but there you are.

Spring is the best time of year to divide our too-big perennials, and hostas can present a real challenge once they get large: the roots are thick and tough.

A few years back, my friend Deb clued me in to using a drywall saw to slice through hosta roots, and this works beautifully. A drywall saw can be found in any hardware store and is usually less than $10; and if you don't leave it outside to rust (I plead guilty), it will last a long time.

Here's a series of photos to give you visual step-by-step instructions:

1. The aforementioned handy-dandy drywall saw

2. With the drywall saw, slice into the roots to make as large a division as you want. Some of my garden beds have lots of little stones (I live in the Granite State, you know ;-), and that can present a challenge in itself, but I have yet to break a sawblade.

3 & 4. Then with a spade (a transplanting shovel works really well), dig that division out.

5. The piece taken out, ready to be planted elsewhere.

If you like, that division can be divided again into smaller chunks; as long as you have a few healthy shoots with good roots, it will grow.

Fill in the hole, of course; plant your division(s) and water in well.
You're done!