
Do you have some daylilies that have been in your garden for years, and now they’ve increased into a large clump? That’s all well and good until it becomes TOO big, and needs dividing. How do you know if it’s time? – well, how did your clump bloom this year? If it sent up plenty of scapes and buds, and you were delighted, all’s well (for now). But did you wonder why there weren’t as many flowers as before? Did that clump seem a bit stingy with its buds and scapes? That tells you that it’s too big, overgrown, choking itself. Time to remedy the situation!
Dividing your daylilies will not only rejuvenate them, but allows you to either expand your daylily plantings, or share your excess with gardening friends. Maybe even both. And really, you don’t want to wait until that clump is so big you’ll need a backhoe to dig it out, or a week’s worth of chiropractic appointments to deal with the aftermath.
And now is the time to do it. Find out when your Average First Frost date is (here in Zone 5 it’s September 22), and count backwards by six weeks; that should (ideally) be your deadline for dividing your plants, to give them time to settle in and send out new root growth before the earth freezes.
(Let me go off on a wee tangent here: of course there’s a difference between light frosts and hard frosts; most perennials are not troubled by light frosts, and they don’t freeze the ground. So I will admit that I tend to keep transplanting later than the gardening books recommend. But in general, perennials divided in the spring will be bigger and stronger the following year than ones divided in the fall; seems logical, doesn’t it? – and it follows that the earlier in latesummer that you divide, the better. That said, if you find that you can’t get to all your dividing as early as you’d like, mulching will help to retain some warmth in the soil, thereby giving those plants a little more time to settle in.)
So, here we go:


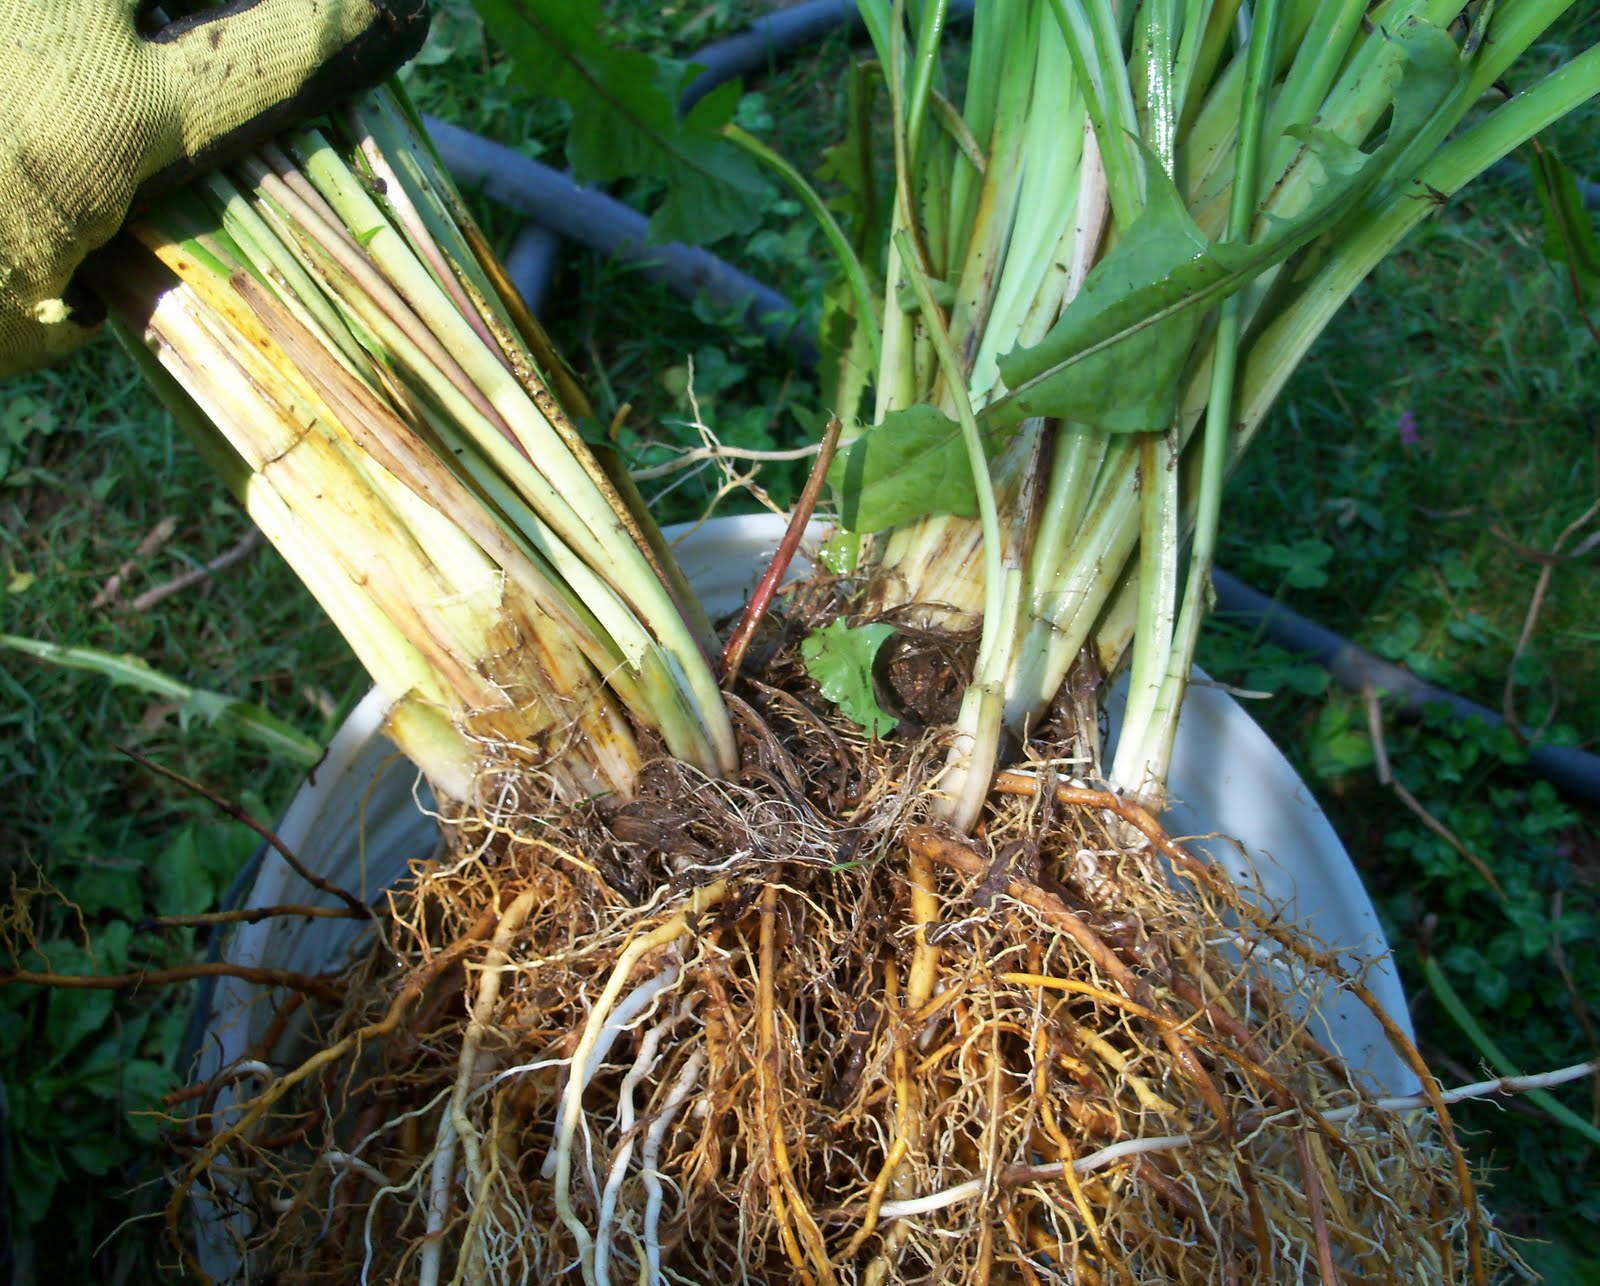
And once in a while, a root ball is just so impenetrable that it seems to be held together with super glue. In that case, you can take a sharp knife to divide. As long as a plant still has roots attached, it should be okay. Some folks prefer to bypass the untangling method and go straight to cutting – you can too, if you wish, but you’re losing some roots that way, and I always think it’s better to leave them intact whenever possible.

Once you’ve divided as much as you’d like, place the divisions in a bucket of water until they’re replanted, or given away. And when replanting, I like to add some rock phosphate to the soil to encourage root growth, or some organic fertilizer that’s strong in phosphorus (the middle of the three numbers you’ll find on fertilizer packages … as in “4-10-4;” this is NOT the time to use a high-nitrogen fertilizer, as that boosts foliage production).
How long can you keep them in that bucket of water before you put them into the ground? I’m embarrassed to tell you how long I sometimes wait! Suffice it to say that several days of soaking won’t harm your plants, as long as you keep that bucket in the shade; but logically, the sooner you plant them, the better. Yes, there are many tales in the gardening world of daylilies ripped out and thrown onto the compost pile that bloom the next summer, bare roots and all, but you may not want to take those kinds of chances!
Once the ground has truly frozen, it’s not a bad idea to put some mulch around your divided daylilies; anything organic, like bark mulch, chopped leaves, straw, substances that will eventually break down and decompose and enrich the soil. And then pray for a good blanket of snow – exactly the protection our daylilies like best!
No comments:
Post a Comment