Saturday, August 13, 2011
Sow Your Own! -- Part One
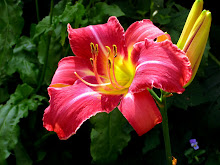
Are green pods appearing on top of some of your daylily scapes, once the blossoms have dried and dropped away (or, if you’re a properly fastidious gardener, after you’ve deadheaded)? These pods contain seeds; if you’re feeling adventurous, why not try planting a few? Following some simple directions should produce some surprise-package new daylilies, and with a little luck, you might have a few that you greatly admire.
Here in Part One, we’ll go over the basic realities of how these seeds came to be, and how to gather and save the seeds. Part Two will give step-by-step directions for sowing and growing.
Without getting into Botany 101 too deeply, basically you need a “pollen parent” and a “pod parent” to make daylily seeds; or, if you like, a papa and a mama ;-). The pollen from one must fertilize the other, resulting in a seed pod. Just like human babies, or puppies, or kittens, each fertilized seed will produce something new – NOT a carbon copy of either parent, but a combination of their genes. If you want a carbon copy of a daylily, you must divide it at the roots.
Now if you have only two kinds of daylilies, it’s pretty easy to figure out who the “parents” are! But the more daylily types you have, the more the possibilities for combinations. When you leave pollination up to chance – meaning wind or bees carrying the pollen from one plant to another – you only know who the pod parent is. Deliberate hybridizing allows you to control both variables, but that’s another blog post, sometime down the road. Today we’re talking about the “surprise package” seed pods.
First of all, wait until the pods dry and turn brown. Once a small crack appears, usually at the top, you can remove the pods and empty the seeds out – but make sure that it’s a dry day, and that the pods are dry. A sunny afternoon is perfect. Place the seeds in a saucer, or on a piece of paper, in a dry airy room out of direct sunlight; leave them there for a few days to make sure all external moisture is gone.
Personally, I like to know which pod parent has produced which seedlings, and so I label little envelopes with the pod parent’s name, and place the dried seeds inside. (You may not be so picky, or may not be planting as many seeds, and so this step might not matter to you.) Either way, place the envelopes, or just the seeds themselves, into a plastic zip-lock bag, seal it, and put it in the refrigerator. It’s going to stay in the fridge for weeks, to mimic the effect of winter cold on seeds that would have otherwise dropped onto the ground.
More to come.
Subscribe to:
Post Comments (Atom)


Oh, how fun,Sounds too addictive! See what you started?!
ReplyDeleteMom and I were passing through Jamaica today and stopped into the Jamaica Coffeehouse to tell them you sent us! Had to get a few goodies from the bakery while there! Thank you... can't wait to visit you again!
And isn't it wonderful to be able to say you took a little day trip to Jamaica? ;-)
ReplyDeleteYes, this is definitely an addiction, but a very inexpensive one ... from the incredible numbers of pods we're seeing this year, I fear I'll have a totally unmanageable number of seedlings next spring!
You are so wise to take the time to travel about in the summer ... looking forward to seeing you again as well!